
Contributor: Andrea Mullarkey
Description: Participants will make a light-up star-shaped ornament.
Supplies:
- Felt
- Embroidery Floss
- Sewing Needles
- LED Lights
- Batteries
- Rotary Cutter & Mat or Scissors
- Electrical Tape
- Glue (Optional)
Number of People: 10
Target Audience: High School
Prep Time: 45 minutes
Program Time: 45 minutes
Instructions:

Step 1: Cut the felt into strips 1/2″ x 6″. A rotary cutter and mat will make this step much easier, but it is not essential. The strips do not need to be exact.

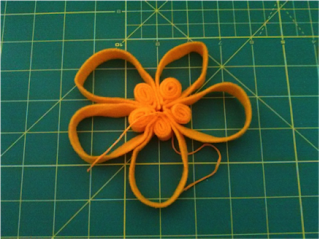
Step 2: Start at one end, begin to roll the felt strips up leaving a tail that will loop around the other side of the spiral you created.

Step 3: Using thread and embroidery floss in a coordinating color, sew one stitch through the bottom of the spiral and the loose end of the felt strip to close the loop. Secure with a double knot and trim the ends of the floss.

Step 4: Repeat 4 more times until you have 5 loops.
Step 5: Using embroidery floss, sew through the bottom of all 5 spirals to connect them. Secure with a double knot and leave long the tails which will become the ornament hanger.

Step 6: Pinch together the tops of the loops and use the embroidery floss and needle to make a few stitches at the top to form a point.
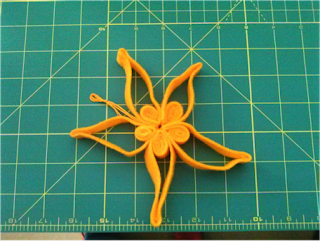
Step 7: Repeat 4 more times until all loops have points.

Step 8: Connect one LED light to a battery. Make sure the longer leg of the LED is attached to the positive side of the battery and the short leg to the negative side. Bend the legs at 90 degree angle so that the LED can push through the small hole left in the center of the star and the battery lies flat against the back of the ornament.
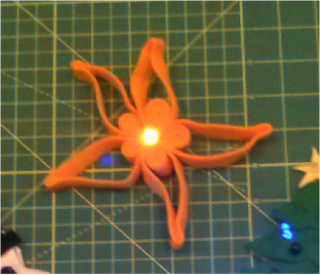
Step 9: Secure the LED to the battery by wrapping with electrical tape and enjoy your ornament!
Optional Step 10: If you don’t like seeing the battery and tape, you may cut a piece of felt larger than the battery but smaller than the center of the ornament and glue it over the battery.
Source: Adapted from a tutorial at: FuzzyLizards
