
Contributor: Jessica Lundin
Description: Create a colorful wrap accessory!
Supplies: (Cord & Floss purchased at Michaels for less than $16)
- Cord
- Embroidery Floss
- Scissors
- Glue (Tacky or Fabric ModPodge)
Number of Participants: 15-20
Target Audience: Middle School, High School
Cost: $16 (scissors & glue already on-hand)
Prep Time: 20 Minutes (but only if you make a sample, otherwise just gather supplies).
Program Time: 30-60 Minutes
Instructions:
Way 1: Single Cord Bracelet
1) Tie a knot at the end of a piece of cord then measure the tail of the cord around wrist (or neck) so that it is comfortably loose. Double back on the cord so that a loop is created that is big enough for the knot to easily slip through and be secured, then cut cord. (The wrapped cord will be a little longer than when it starts, so having a snug-but-not-tight measured cord may help create desired final bracelet).
2) Add a tiny bit of glue to the tail end of the cut cord so that a loop is created. Again, the loop must be big enough for the knot end to fit through the loop.
3) Pick a color of embroidery floss and gently press floss end into the glue used to make the loop in cord. Start tightly wrapping the embroidery floss around the cord so that the end used to make the loop is tight and sealed with the longer end of the cord (towards the knot).
4) Continue to wrap the cord with embroidery floss. To switch colors, trim the previous color with a short tail (less than 1 inch), then create a small tail (also less than 1 inch) with the new color and start wrapping the new color as close to the last wrap of the previous floss color.
5) Once you get to the very end of the cord, where the knot is, put a tiny bit of glue at the end, and tie a knot with the embroidery floss. Cut the floss as close to the knot as possible and press till the floss stays in place.
6) (Optional) Put a small amount of glue on the knot of the cord because the cord was unraveling.
Way 2: Double Cord Bracelet
1) Tie a knot at the end of a piece of cord then measure the tail of the cord around wrist (or neck) so that it is comfortably loose. Double back on the cord so that a loop is created that is big enough for the knot to easily slip through and be secured. Then run the cord back down to the knot so that the cord is double the length, and cut cord. (The wrapped cord will be a little longer than when it starts, so having a snug-but-not-tight measured cord may help create desired final bracelet).
Note: There are two ways to wrap the floss and which way you go should be decided now. Though, the way the floss is wrapped only matters when using variegated floss (floss that isn’t one solid color).
Chasing Figure-8: If you choose this method, you will need to start in the middle of the embroidery floss, so unwind as much floss as you think you’ll need, find the middle, then follow Step 2. This will give smaller stripes of color. If you intend to use only one color with a Chasing Figure-8, there is a good chance you will need the entire length of new floss.
Single Figure-8: Start from one end of the floss, leaving a short tail, and weave the floss around each cord tightly as you work your way down, going over-under, continuously. This gives slightly larger blocks of color using a variegated floss. Continue with Step 2.

2) Pick a color of embroidery floss and weave the floss under one cord and over the other where the loop is best to fit the knot. (Again, the loop that forms should be big enough to fit the knot at the other end of the cord). If you’re going with a Chasing Figure-8, the floss at the top of the base of the loop should be the middle part of the floss, while a Single Figure-8 is at one end of floss with just a little bit of a tail to be secured under the tight wrap. You can add a bit of glue at this stage but it is only necessary for a Single Figure-8 since it has an end of floss under the wrap. Be sure to wrap tightly so that there is no cord showing…unless that is what you want.
Chasing Figure-8: The floss under the cord will wrap up over the same cord, back between the two cords and it will lead under the other cord. The floss over the cord will wrap down under the same cord, back between the two cords and it will lead back over the other cord. Continue.
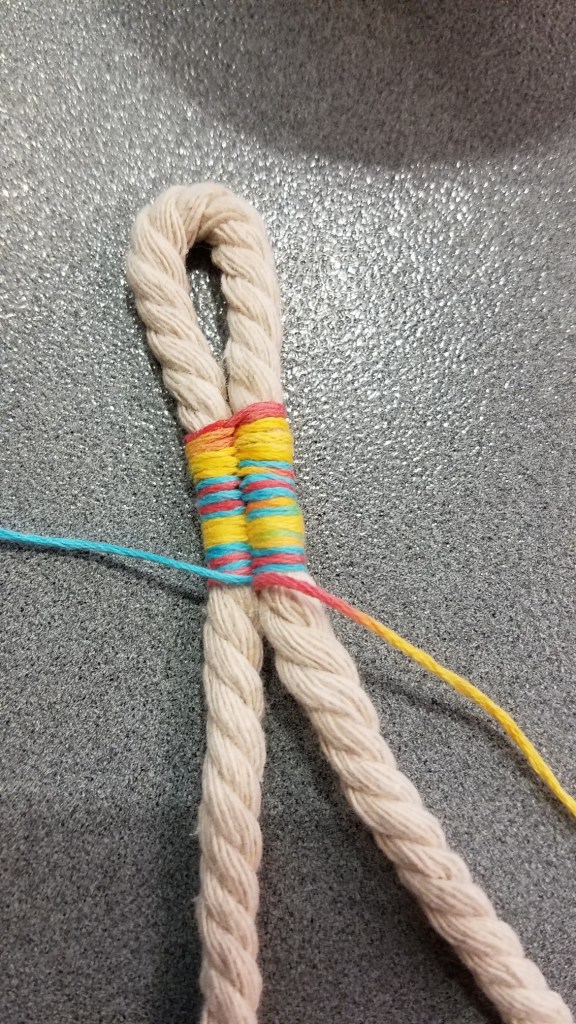
Single Figure-8: Use the long end of the embroidery floss to weave, over-under one cord, then over-under the other, repeat.

3) Continue to wrap/weave the floss using either Chasing Figure-8 or Single Figure-8 until you reach the end of the cord, nearest the knot. Add a bit of glue, tie a knot, and trip the floss as close to the knot as possible.
Source: ModPodgeRocks Blog
